Curved walls, rounded columns, and architectural arches can add character to an interior or building facade. However, applying a decorative stone finish to these shapes can be challenging when using rigid or heavy materials.
Flexible stone veneer, also known as soft stone or flexible stone cladding, offers a lightweight decorative option for selected curved surfaces. Its suitability depends on the product's construction, flexibility, installation method, and the condition of the substrate.
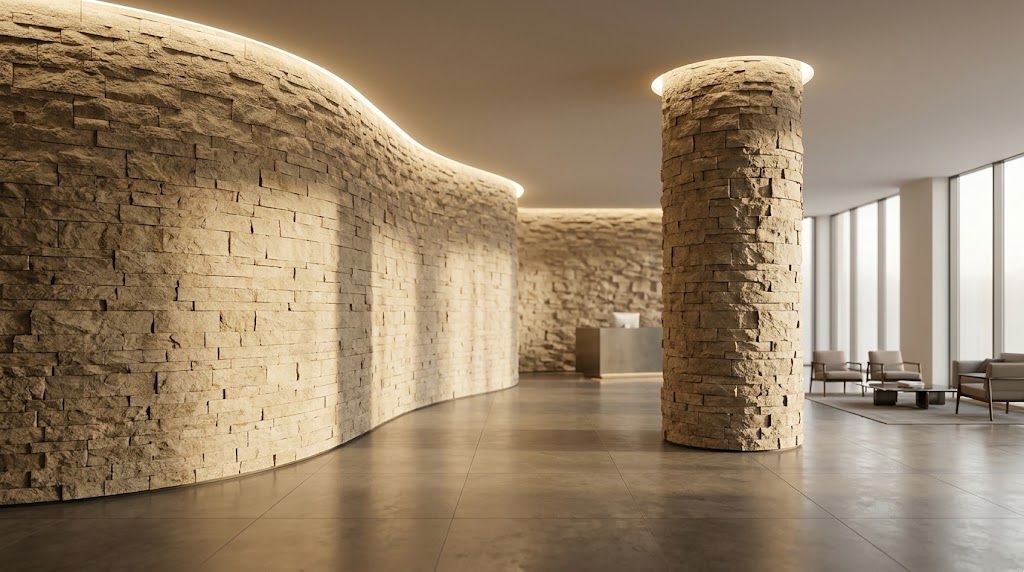
In this guide, we explain the key preparation steps and installation considerations for applying flexible stone veneer to curved walls and columns.
1. Prepare the Materials and Tools
Before starting, check the manufacturer's installation instructions and confirm that the selected flexible stone product is suitable for the intended application.
Materials
* Flexible stone veneer sheets or panels
* Adhesive recommended for the specific product and substrate
* Primer, if required by the substrate or adhesive manufacturer
* Jointing or sealing products, where specified for the installation
Tools
* Measuring tape and pencil
* Straightedge or suitable template for curved surfaces
* Utility knife or cutting tool approved for the product
* Notched trowel, if required by the adhesive system
* Rubber roller or suitable pressing tool
* Level and protective equipment
Tool and adhesive requirements can vary between products. Do not use a heat gun, substitute adhesive, or apply a surface sealer unless the product instructions specifically permit it.
2. Step-by-Step Installation on Curved Surfaces
Step 1: Inspect and Prepare the Substrate
The substrate should be clean, dry, stable, and suitable for the selected adhesive system. Remove dust, loose material, grease, and other contaminants that could interfere with bonding.
Check the wall or column for uneven areas, cracks, and loose coatings. Any necessary repairs should be completed before installation begins.
For curved surfaces, also check the radius and shape of the substrate. Confirm that the selected product can accommodate the curve without excessive bending, creasing, or stress.
Step 2: Measure and Dry-Fit the Sheets
Measure the height, circumference, and curved sections of the wall or column. Where necessary, create a template to help achieve accurate cuts and consistent alignment.
Position the sheets before applying adhesive to check the layout, pattern direction, edges, and joint locations. This is particularly important for stone-inspired finishes, where pattern continuity can affect the final appearance.
Follow the manufacturer's guidance for the minimum bending radius and cutting method. If the curve is too tight for the selected material, choose a more suitable product or revise the design rather than forcing the sheet into position.
Step 3: Apply the Recommended Adhesive
Select an adhesive compatible with the flexible stone product and the substrate. Application method, trowel notch size, coverage, and open time should follow the relevant technical instructions.
Apply the adhesive evenly to the specified area and avoid spreading more than can be covered within the adhesive's working time.
Some flexible stone products may use a different fixing system, including a self-adhesive backing. These systems should be installed according to their own instructions and should not automatically be treated as equivalent to products that require separate adhesive.
Step 4: Position and Press the Material
Carefully align the sheet with the planned layout and press it onto the prepared substrate as instructed by the manufacturer.
Work progressively across the surface, paying attention to the curved sections and edges. Use an appropriate roller or pressing tool where recommended to improve contact and remove trapped air.
Avoid excessive force that could stretch, crease, or damage the material. Check alignment as you work, since adjustments may become difficult after the adhesive begins to set.
Step 5: Finish Joints and Edges
Where multiple sheets are required, follow the manufacturer's recommended joint spacing and edge-finishing method.
Depending on the product and design, joints may be butted or finished using a specified jointing material. Do not assume that tight butt joints are suitable for every installation.
Pay particular attention to the top and bottom edges, external corners, and transitions between the flexible stone and adjacent materials. Correct detailing helps create a consistent appearance and supports the durability of the finished installation.
Step 6: Allow the Installation to Cure
Allow the adhesive to cure for the period stated in its technical instructions. Curing time may vary with the adhesive type, substrate, temperature, humidity, and site conditions.
Avoid disturbing the sheets or exposing the installation to moisture before the system is ready for the next stage.
Apply a protective sealer only if it is recommended for the selected product and application. For outdoor or moisture-exposed areas, confirm the suitability of the complete installation system, including the substrate, adhesive, joints, edge details, and surface treatment.
3. Common Installation Mistakes to Avoid
Choosing a product that cannot accommodate the curve
Not every flexible stone product is suitable for tight radiuses. Confirm the permitted bending range before starting.
Skipping the substrate check
Dust, unstable coatings, and uneven surfaces can compromise adhesion. Prepare the substrate according to the adhesive manufacturer's instructions.
Using an unapproved adhesive or heating method
Different products have different backing materials and installation requirements. Unapproved heating or adhesive substitutions may damage the product or reduce bond performance.
Ignoring edges and joints
Curved installations often contain more transitions and edge details than flat walls. Plan these areas before cutting and fixing the sheets.
Assuming every product is suitable for outdoor use
Outdoor applications require products and installation systems designed for the relevant exposure conditions. Verify the manufacturer's technical data before specifying the material.
Conclusion: Plan the Curve Before Installation
Flexible stone veneer can provide a decorative stone-inspired finish for selected curved walls and columns without relying on conventional heavy masonry. A successful installation starts with choosing a suitable product, preparing the substrate, measuring the curve accurately, and following the specified adhesive and finishing procedures.



 +86 133 2501 4063
 info@speedingdecor.com

Room 102, Building 4, Tongshun Park, Qingdao Net Valley, No. 1 Tongshun Road, Chengyang High-tech Zone, Qingdao, Shandong, China.





 English
 Español


